Our tags can be implemented using plugins on sites built with WordPress. One of the most commonly used plugins is Ad Inserter Pro.
1. Header tag: Implement our header tag that will scan our ad tags only once on all pages where you would like to serve our ads.
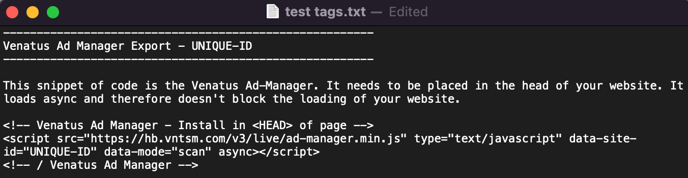
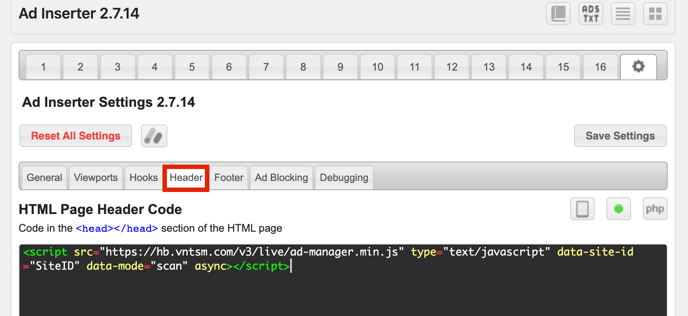
Example of the header tag below:
How to implement the header tag:
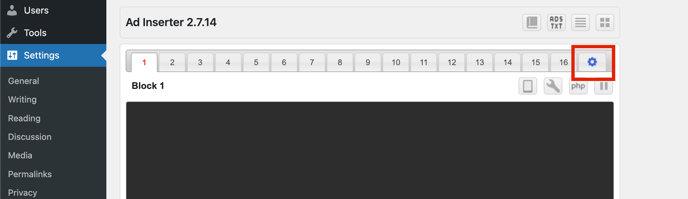
1. Click on settings in ad inserter pro:
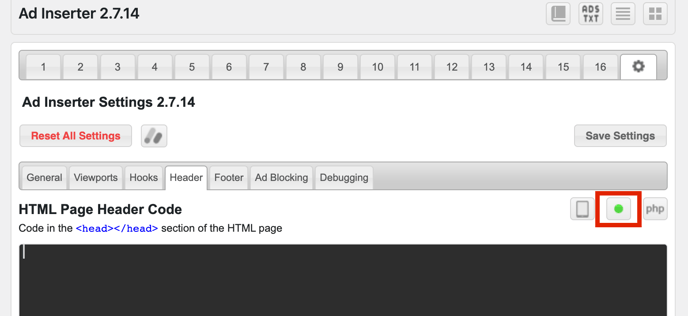
2. If it is inactive and grey, click on it to enable it. Otherwise, the header tag will not be implemented.
Inactive

Active
3. Copy the header tag in the tag file.
4. Paste here:
5. Save settings
2. Ad tags: Implement our placement/ad tags to load our ads.
How to implement the ad tags:
Example of the ad tag below:
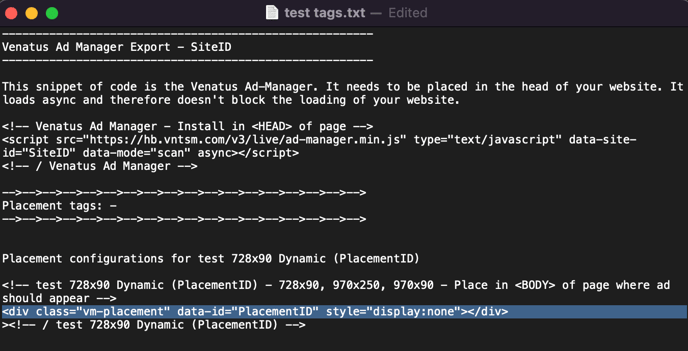
Copy the ad tag that you want to run.
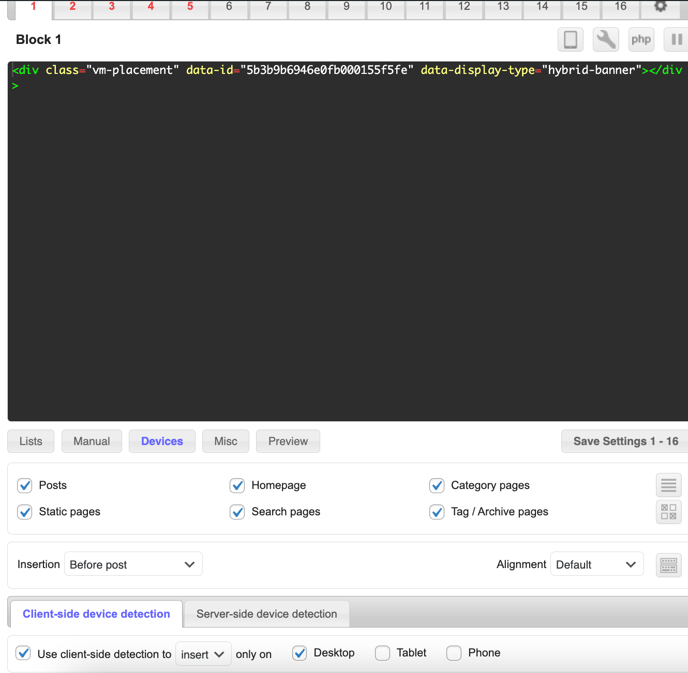
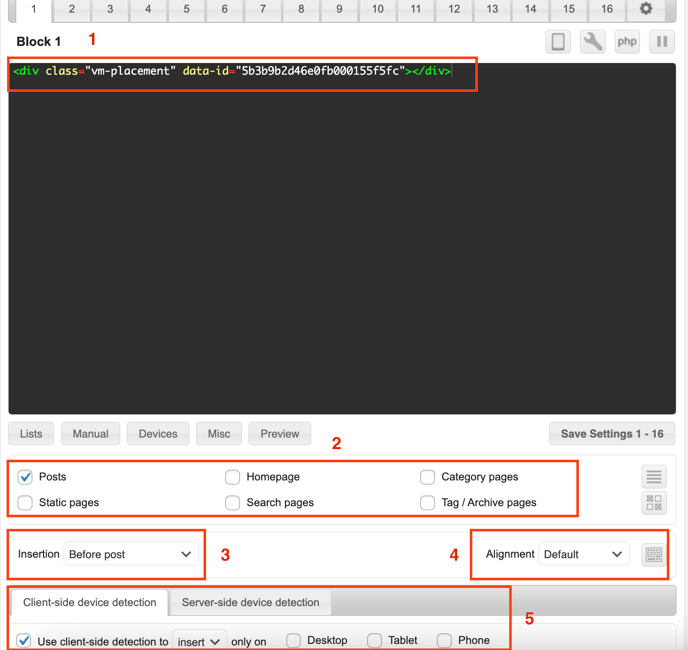
1. Paste the tag into one of the blocks.
2. Choose on which pages you want to run the ad.
3. Choose where on the page you want to load the ad
4. Keep alignment as the default unless you want to change its place or add custom CSS
5. Click on Devices, use client-side detection, select “insert” and device where you want to load the ad
6. Save Settings
Workaround:
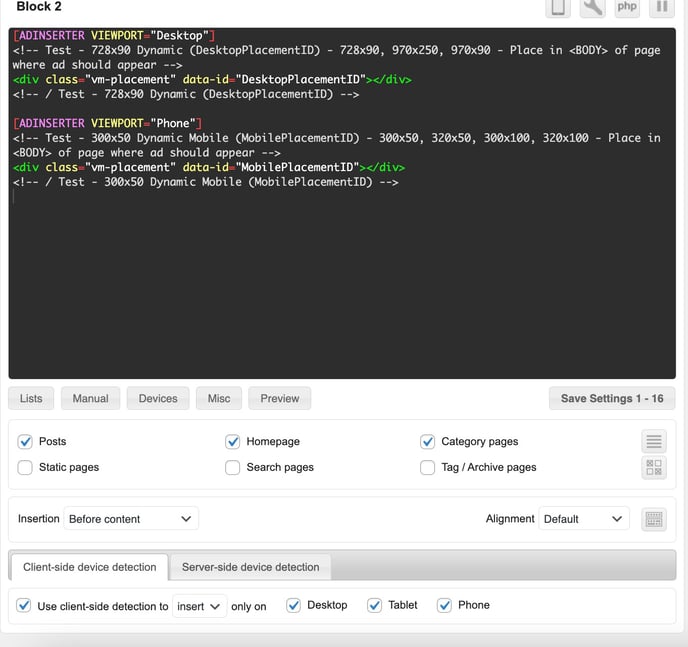
If you want to implement one of our desktop tags in desktop and smaller tag in mobile in the same place, you can implement tags as the following:
[ADINSERTER VIEWPORT="Desktop"]
<!-- Test - 728x90 Dynamic (DesktopPlacementID) - 728x90, 970x250, 970x90 - Place in <BODY> of page where ad should appear -->
<div class="vm-placement" data-id="DesktopPlacementID"></div>
<!-- / Test - 728x90 Dynamic (DesktopPlacementID) -->
[ADINSERTER VIEWPORT="Phone"]
<!-- Test - 300x50 Dynamic Mobile (MobilePlacementID) - 300x50, 320x50, 300x100, 320x100 - Place in <BODY> of page where ad should appear -->
<div class="vm-placement" data-id="MobilePlacementID"></div>
<!-- / Test - 300x50 Dynamic Mobile (MobilePlacementID) -->
Use “Client-side detection” choose "Insert" and select All devices.
Sample:
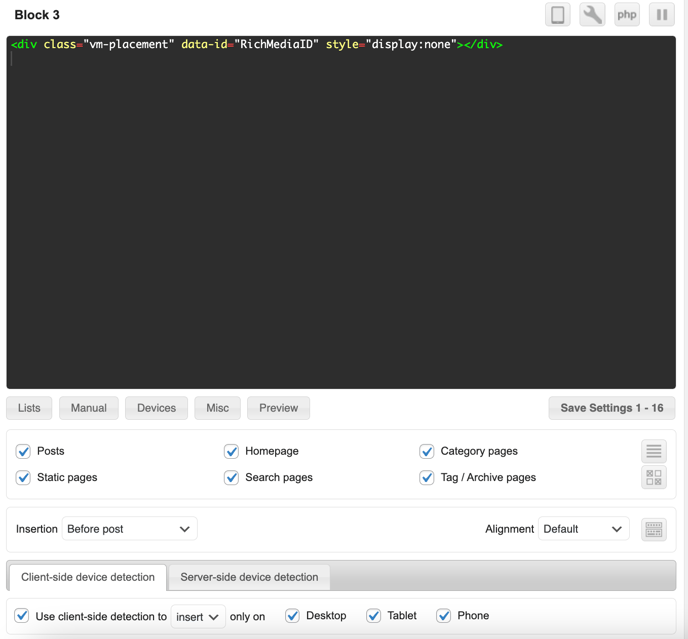
How to implement the rich media tag:
We run the vertical sticky, sticky footer and video slider through the rich media tag. We enable/disable these formats as per publishers’ requests.
If you would like to run these formats, you will need to implement the rich media tag only once on each page. It can be implemented anywhere in the body.

-
Copy the rich media tag
-
Paste in one of the blocks
-
Choose pages where you would like to run the formats
-
You can implement the tag anywhere on the page in the body
-
Click on Devices, use client-side detection, select “insert” and choose devices where you want to load the formats
How to implement the tag for the takeover
We run the takeover through the 728x90 Dynamic tag with the hybrid banner. The ad should be implemented at the top of the page, under the navigation bar.
-
Copy the ad tag with the hybrid-banner:
<div class="vm-placement" data-id="PlacementID" data-display-type="hybrid-banner"></div>
2. Paste in the block
3. Choose pages where you would like to run the takeover
4. Choose “Before post” as insertion
5. Choose desktop as a device